추천 글 🍀
[SpringBoot] REST API 카카오 로그인 개발하는 법
SpringBoot를 이용하여 카카오 로그인을 구현해 보겠습니다. 카카오 로그인에 대해서 설명되어 있는 공식 문서입니다. 공식 문서에 설명 ...
[구조 패턴] 어댑터 | 퍼싸드 | 컴포지트 | 브리지 패턴 (with 예시 코드)
GoF가 정의하고 있는 23가지 패턴은 3가지 종류(생성, 구조, 행위)로 분류한다. 정보처리기사 필기 시험에서 해당 종류에 속하는 패턴을 ...

SpringBoot 프로젝트에 Swagger 2.0를 적용해 보겠습니다.
1. 코드 작성
SwaggerConfig.java
@Configuration
public class SwaggerConfig {
    @Bean
    public OpenAPI openAPI(){

        // 명세서 정의부
        Info info = new Info()
                .title("Swagger API Document")
                .version("v0.0.1")
                .description("API 명세서입니다.");

        // http 서버를 생성합니다.
        Server httpServer = new Server()
                .url("http://localhost:8080")
                .description("HTTP server");

        // https 서버를 생성합니다.
        Server httpsServer = new Server()
                .url("https://{배포주소를 넣어주세요}")
                .description("HTTPS server");

        // 만약 프로젝트에 JWT 토큰을 구현했다면 추가해주세요!!
        SecurityScheme securityScheme = new SecurityScheme()
                .type(SecurityScheme.Type.HTTP)
                .scheme("bearer")
                .bearerFormat("JWT")
                .name("Authorization");
        SecurityRequirement securityRequirement = new SecurityRequirement().addList("BearerAuth");

        return new OpenAPI()
                .components(new Components().addSecuritySchemes("BearerAuth", securityScheme))
                .info(info)
                .addSecurityItem(securityRequirement) // JWT 토큰이 없는 분들은 이 줄의 코드는 빼주세요
                .servers(List.of(httpServer));
    }
}
http 서버와 https 서버를 추가할 수 있습니다.
또한, jwt 토큰을 구현했다면 헤더에 jwt 토큰을 담아야 하기 때문에 SecurityScheme을 이용하여 jwt를 담는 곳을 구현할 수 있습니다.
build.gradle
dependencies {
	// swagger
	implementation group: 'org.springdoc', name: 'springdoc-openapi-starter-webmvc-ui', version: '2.1.0'
}
2. 결과 확인하기
Swagger 2.0 접속 주소
http://localhost:8080/swagger-ui/index.html
http://localhost:8080 ➡️ 프로젝트를 배포한 경우, 이 부분을 배포 주소로 변경하면 됩니다.

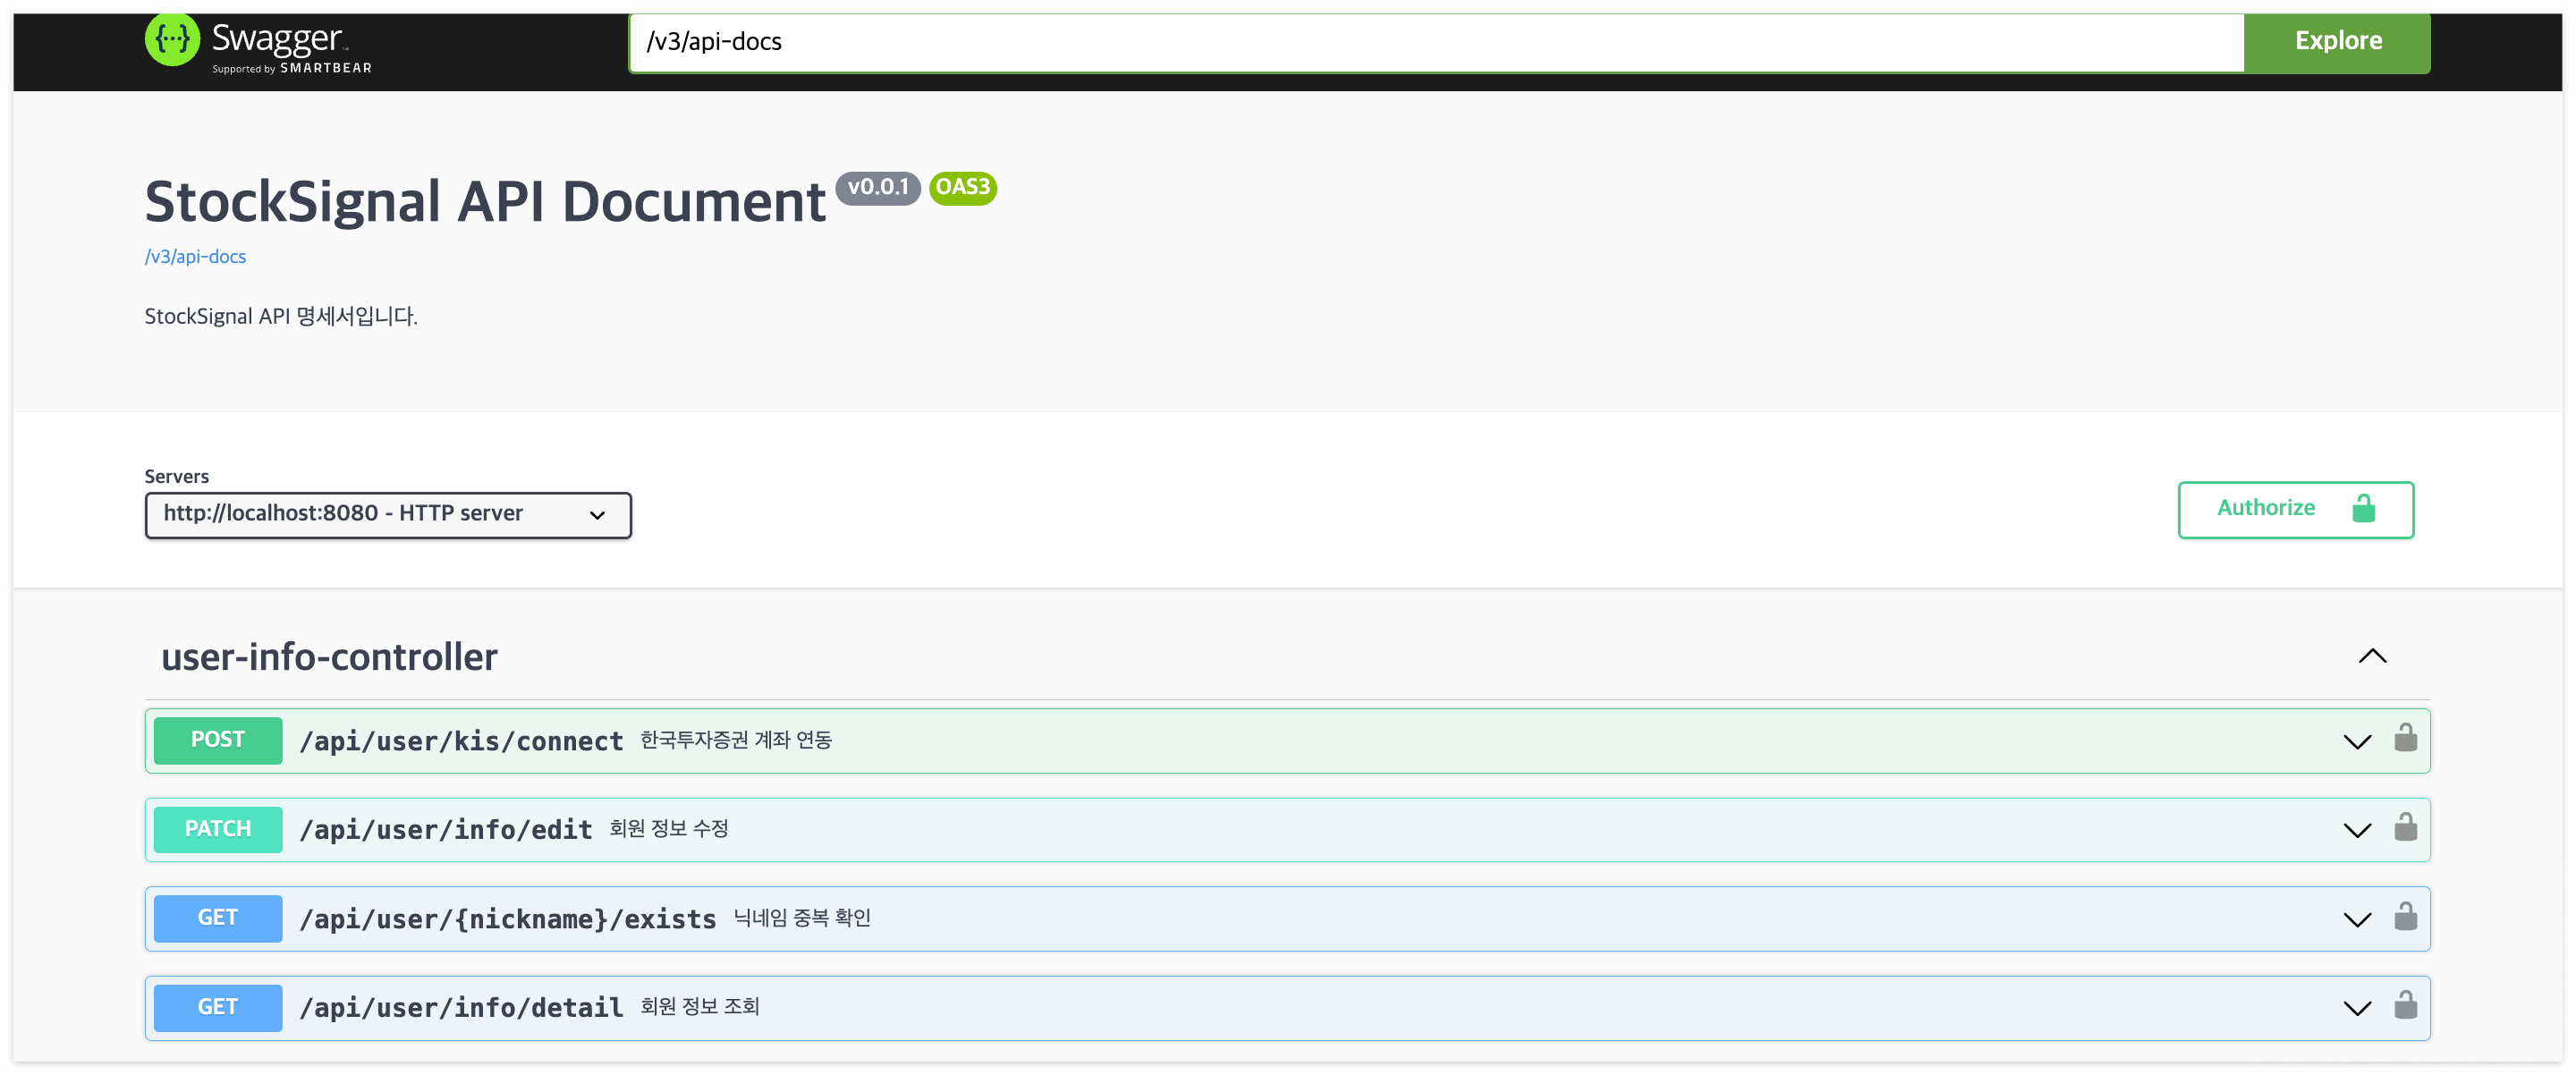
Springboot 프로젝트를 실행하고 해당 주소로 들어가면, API 명세서를 확인할 수 있습니다.

우리가 추가한 http와 https 서버를 확인할 수 있습니다.

오른쪽에 위치한 Authorize 버튼을 클릭하면 JWT 토큰을 입력할 수 있습니다.

각각의 API에도 JWT 토큰을 입력할 수 있습니다.
'Framework > Spring' 카테고리의 다른 글
| [트러블슈팅] Springboot - Swagger가 업데이트 되지 않을 때 (0) | 2024.11.11 |
|---|---|
| [Springboot] @RequestBody @RequestParam @PathVariable 차이점 (0) | 2024.11.10 |
| [Spring] ModelAndView, Model - MVC, Observer(옵저버) 패턴 (2) | 2024.01.24 |